Introduction to Custom Role & Rights Management in MindScroll LMS
This is an easy-to-follow step-by-step guide to restrict an email domain for public registration using the MindScroll LMS account.
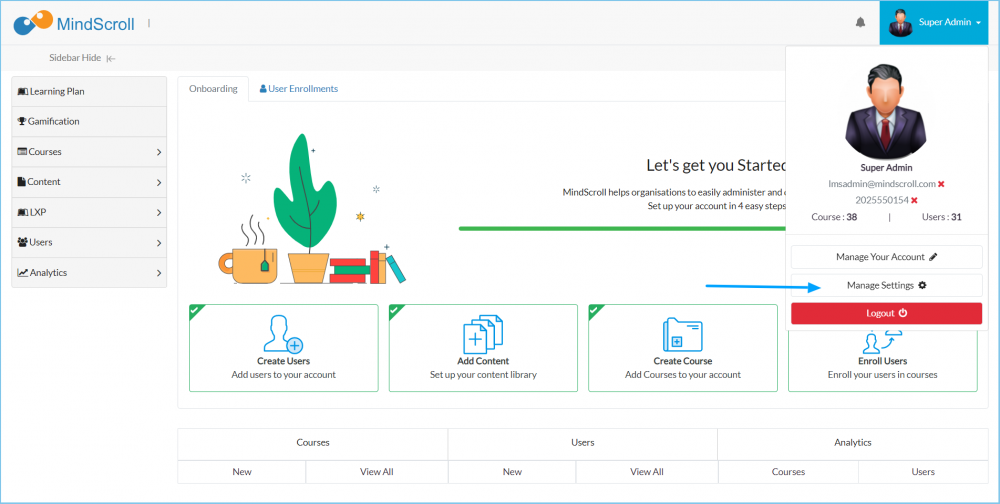
- Navigate to Role Settings: To access and follow the given steps, login as an "Admin" or "Instructor" into your MindScroll LMS.
To access the course editor to create a course, click on Your Name with Drop-down (in the top right corner)~> Manage Settings ~> Role Settings in the left navigation menu.
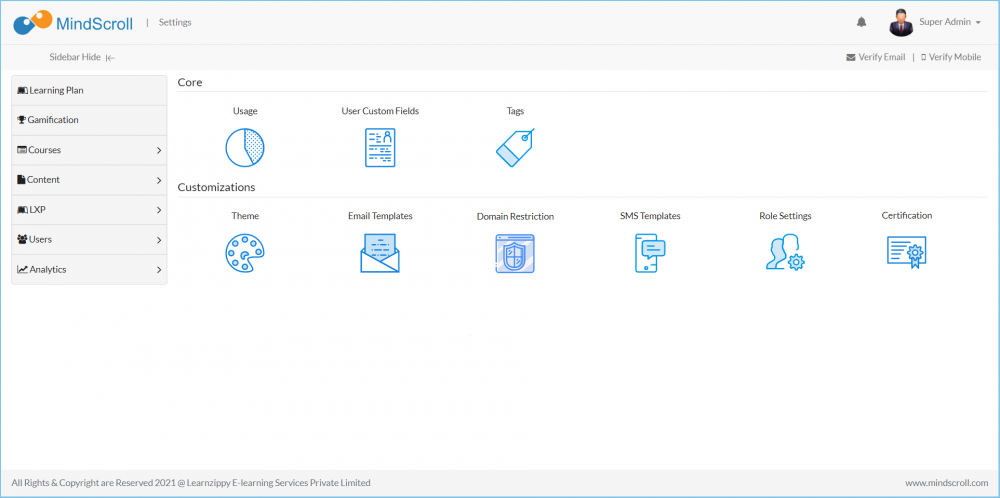
Click on "Role Settings" to manage the custom roles in the portal.
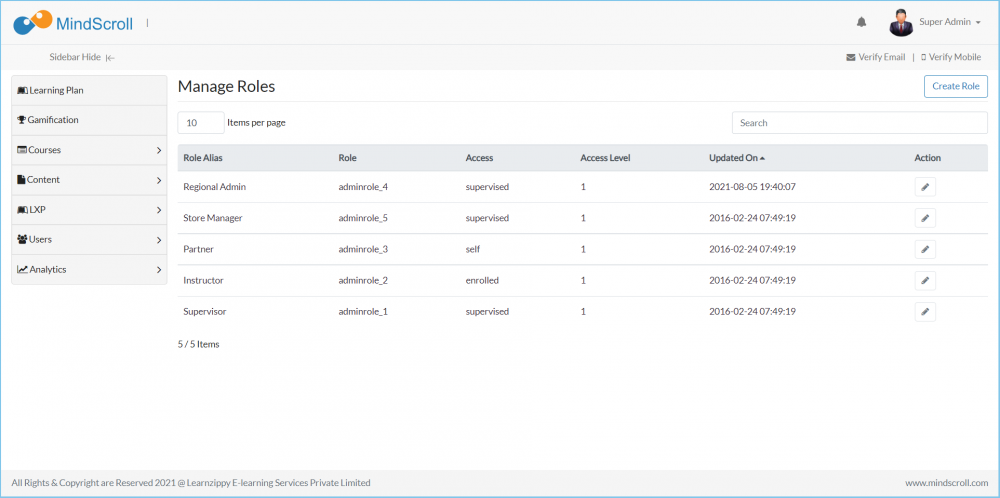
All the Already existing roles will be listed below.
In order to create a role click on the "Create Role" button.
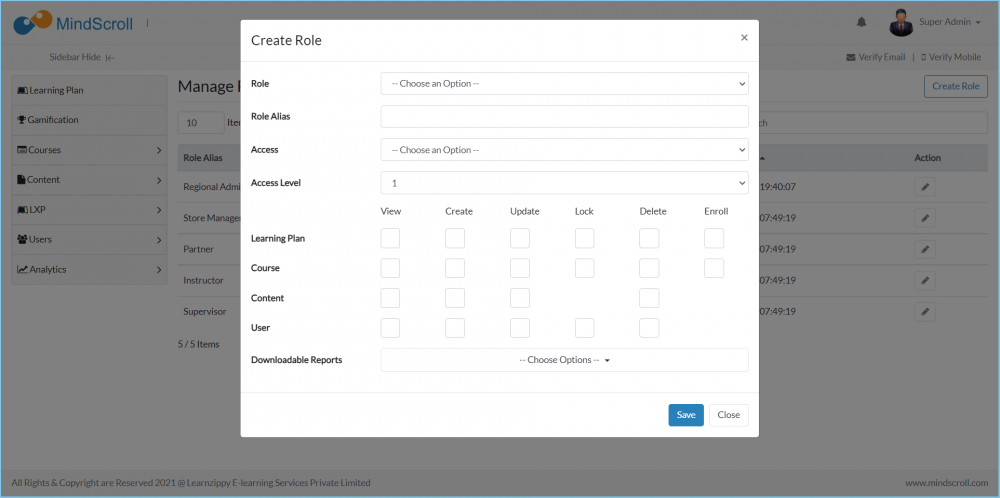
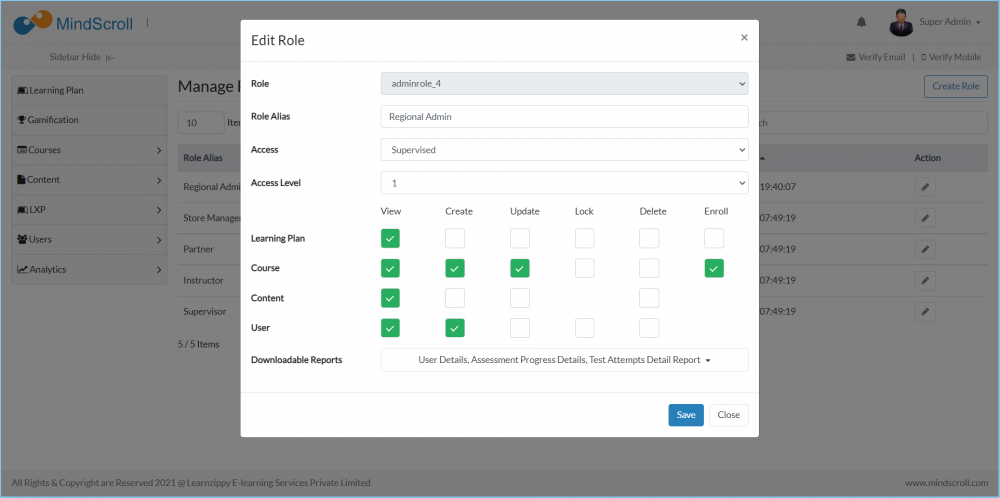
You will be able to see the below pop-up modal, once click on the "Create Role" button.
- You can create up to 10 custom roles within the portal, which means 10 different sub-admins rights can be created.
- Role: all the unused roles will be listed in the drop-down view from which you can select one.
- Role Alias: It is a name that will be displayed in the "Create User" form within the role drop-down.
- Access: you have five types of access that are present in the drop-down i.e. All, Supervised (Particular values that have been assigned), Self (Only those items he/she himself/herself created in the system), None.
- Access Level: As you have 10 roles, by level drop-down you can create the hierarchy. 1 (One) being the highest and 10 (Ten) Being the lowest. (Note: The higher-level roles can see the items created by lower roles)
- Download Reports: You can select the listed reports that this particular role should have access to.
They are 6 types of access you can grant based on enabling checkbox parallel to the feature label:
- View: By enabling this checkbox you will grant access to viewing the created items in the system.
- Create: By enabling this checkbox you will grant access to create new items in the system.
- Update: By enabling this checkbox you will grant access to update existing items in the system.
- Lock: By enabling this checkbox you will grant access to lock existing items in the system, so it can no longer be accessible to anybody until they have unlocked it.
- Delete: By enabling this checkbox you will grant access to delete existing items in the system.
- Enroll: By enabling this checkbox you will grant access to manage user enrollment of existing items in the system.
Once you have created a role you can manage the role by clicking on the "Edit" icon in listed items.
Please Note: To know more about settings, please refer to other respective documentation present in the category.
Account Settings, Administrator Feature, How to Guide, Instruction, Knowledge, LMS Platform Navigation


