Introduction to User Management in MindScroll LMS
This is an easy-to-follow step-by-step guide to create and manage a user using MindScroll LMS account.
- Navigate to Manage Users: To access and follow the given steps, login as an "Admin" or "Instructor" into your MindScroll LMS.
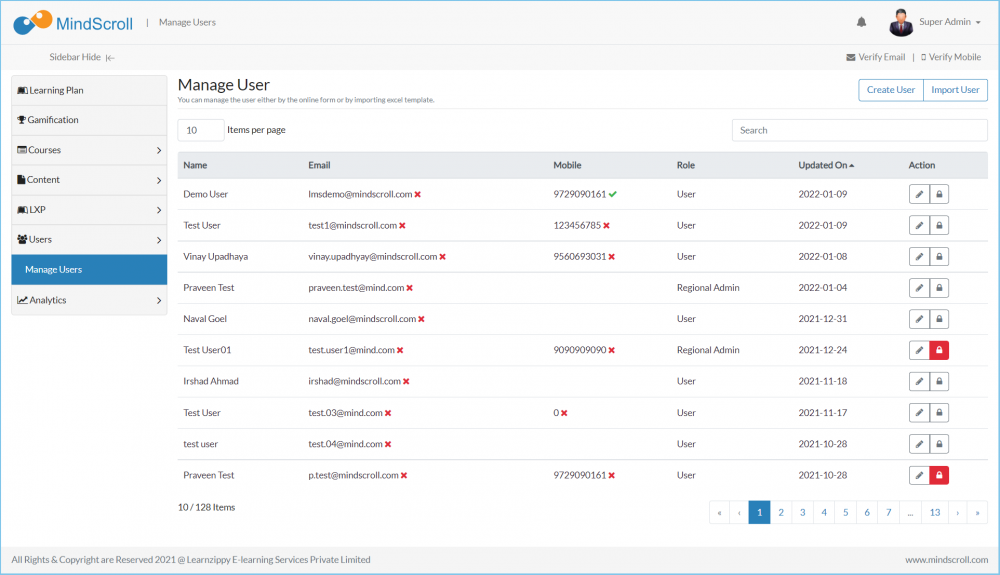
To access the course editor to create a course, click on Users~> Manage Users in the left navigation menu.

To Search a particular user, type the username or email id in the ‘Search’ box and press ‘Enter’.
- For searching only Active users you can type in "Active" and for only locked Users you can type in "Locked".
To sort the list on Name, Email ID, or last updated date, click on the corresponding column header. Click again to sort the list in reverse order.
Know what icons mean that are next to email and mobile.
- "Red Cross" icon means that the user has not verified (his/her email or mobile).
- "Green Tick" icon means that the user has verified (his/her email or mobile).

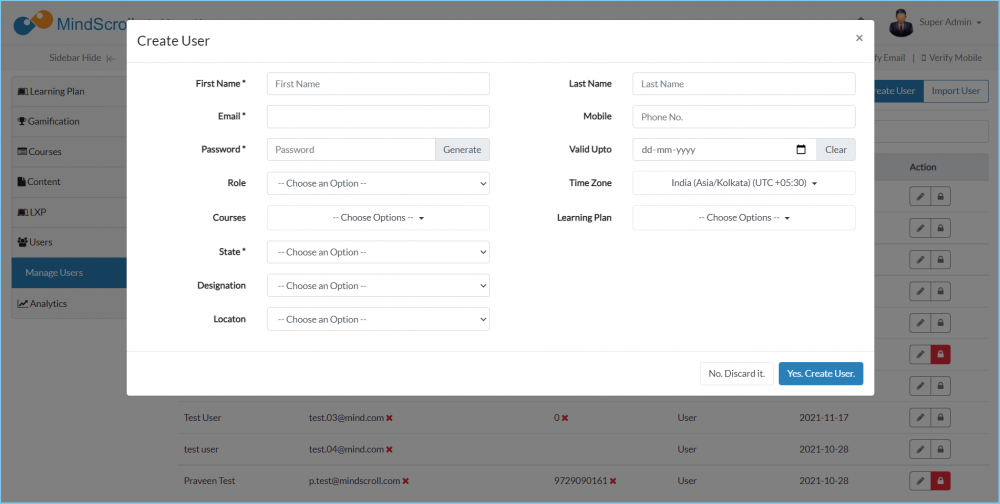
*Create User Details
The important things to keep in notice:
- (*) Star means that field is mandatory.
- Default fields First Name, Last Name, Email, Mobile, Password, Role, Valid Upto, Time Zone - The rest of the fields are customizable from User custom fields.
- From Courses and Learning Plan - While creating the users you can directly enroll him from these drop-downs.
- Valid Upto: the user will be automatically locked until we remove these detail from a particular user form.
- Role: A user can be associated with a single role, apart from users sub-admin can be defined from the Role Settings within Manage Settings.
- Timezone: this is relevant to know the system that this particular user belongs to that particular zone.

*EDIT USER DETAILS
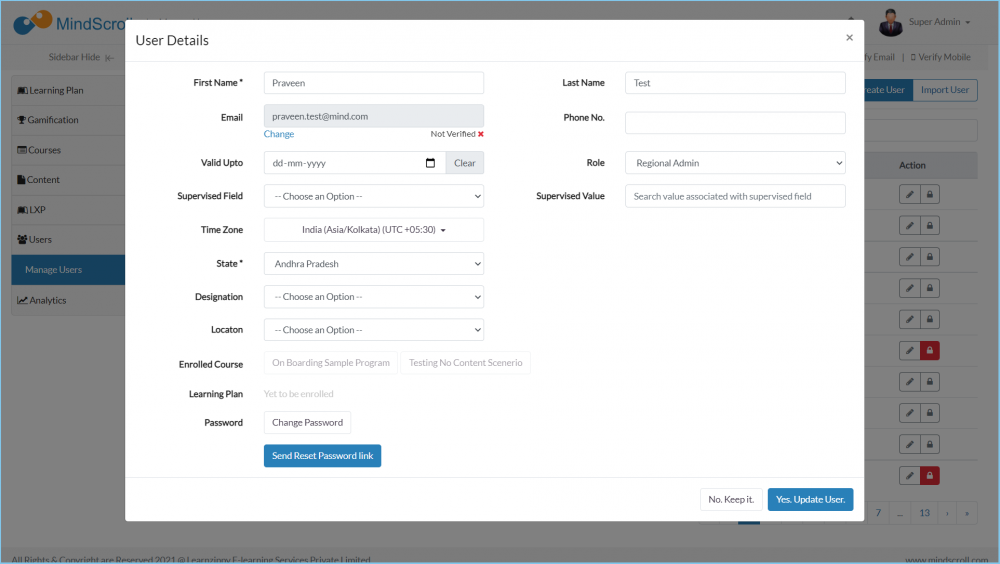
To edit details of a particular user, click on the ‘Edit’ icon against it.
- From the edit screen, you will also be able to see which courses and learning plans he/she has been enrolled in.

Edit user details and click on ‘Save’.
RESET USER PASSWORD
To Reset the Password of a particular user, Click on Reset’. Enter the new Password, Confirm the password and click on Save.

To enable the user to reset the password on their own, Click on “Send Reset Password Link”, and click on ‘Yes’ to confirm the action.

An email with a link to reset the password is sent to the user.
CHANGE USER ROLE
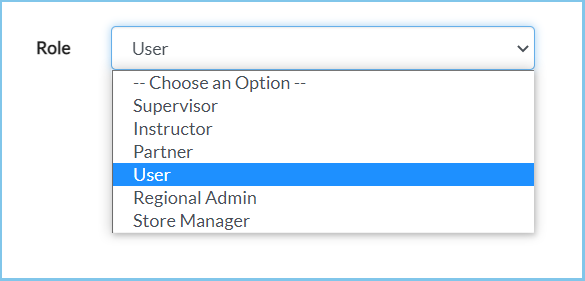
To Change the Role of a user Click on the 'Role' dropdown and Select a Role and Click on 'Save'.

LOCK USERS
To Lock a user, Click on the 'Lock' icon against the user and Confirm by clicking on 'Yes, Lock User'.


The Locked user will appear with a red Locked icon against the user.

Unlock Users
To Unlock User, Click on the red lock icon against the username and confirm by clicking on 'Yes, Unlock User'.

Please Note: To know more about User Management, please refer to other respective documentation present in the category.
Admin View, Administrator, Administrator Feature, Custom Fields, How to Guide, Instruction, Knowledge, LMS Platform Navigation, Lock User, Update User, User Management
