Introduction Live or Virtual classes as a Learning Asset
This is an easy-to-follow step-by-step guide to maintain and activate Live classes into your MindScroll LMS account.
A virtual classroom is a teaching and learning environment where participants can interact, communicate, view and discuss presentations, and engage with learning resources while working in groups, all in an online setting.
Please Note: In order to use the live session in MindScroll LMS.
a. The Organization can either have its own admin account to a virtual meeting platform like Zoom, WebEx, etc. or we can arrange one, which will be integrated into the MindScroll LMS.
b. To Access this feature, the login-ed user must need to be an admin in MindScroll LMS.
- After login as an admin, navigate yourself to the "Content" tab in the LMS navigation bar, then visit the "Manage Live Classes".
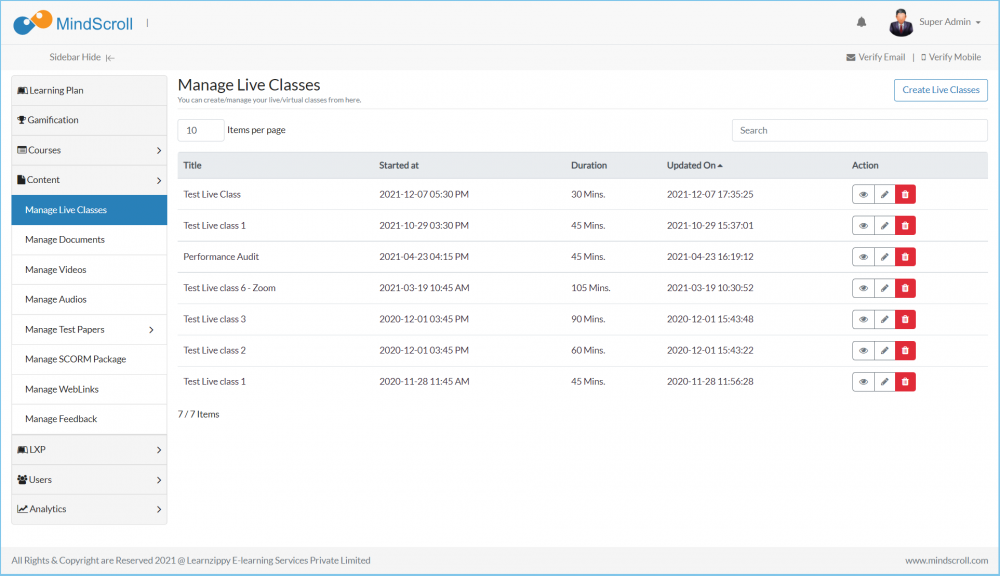
- This shows the Manage Live Classes view with a list of all the scheduled or conducted Live Classes along with the status.
- To schedule a new Live Class, Click on the 'Create Live Class' button. This will take you to a popup.
- On that new subpage, you will need to enter the details of the meeting.
- Title - Enter Title of the Live Class.
- Start DateTime and Duration - Enter start time and duration of the Class.
- Description Text - Enter Description of the Live Class or any additional message regarding the class.
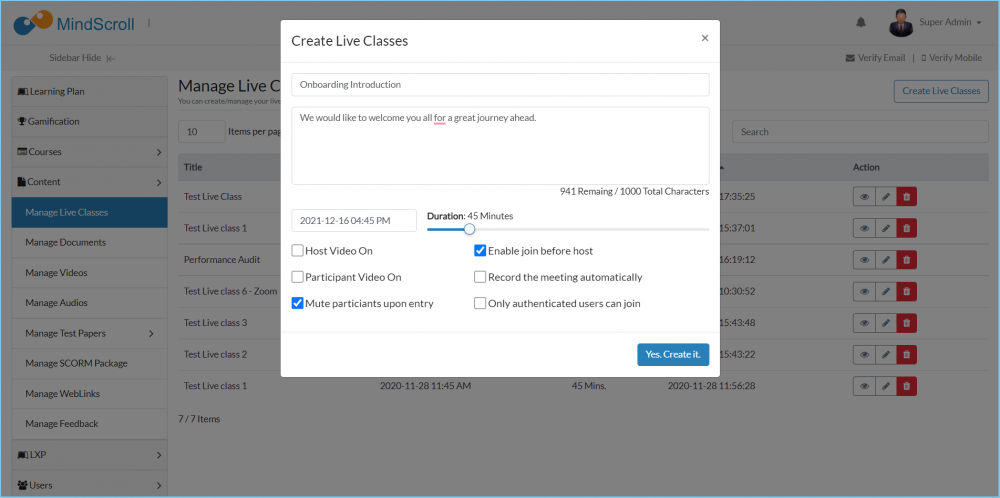
- Click on 'Save' to schedule the Live Class. The new Class will appear in the list of Live Classes below.
Adding a Live Class to a Course
- To add a Live Class in the Course, Go to Courses --> Manage, Select the relevant course and Click on 'Edit Course' icon. (If you are creating a new course then Go to Course --> New, fill the details & submit)
- Select the 'Add Content' tab.

- This shows the Course Structure with Sections and Sub sections. Select the relevant section where you want to add the Live Class and click on 'Add Content' button.
- This opens the content library, Search for the "Live Class" that you have created, & can also search by Title, Type or Last updated date-time and Click on 'Add' button.
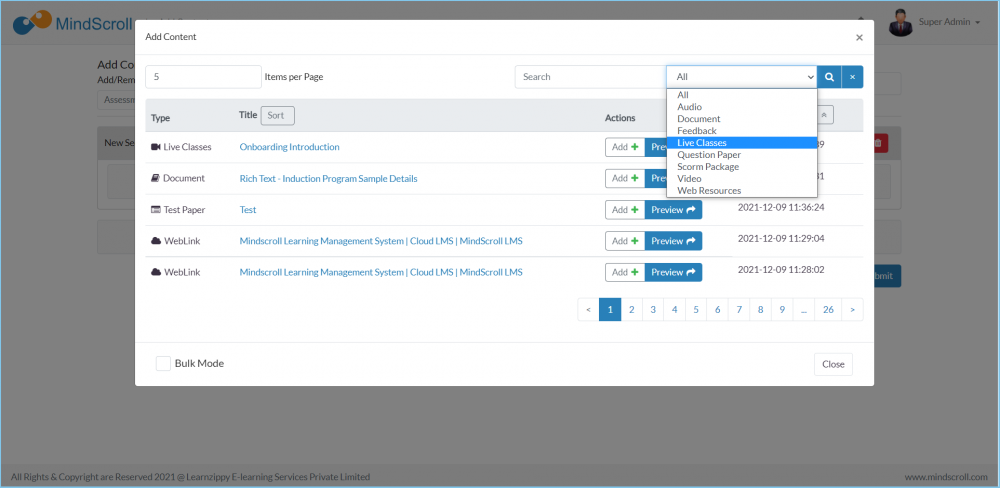
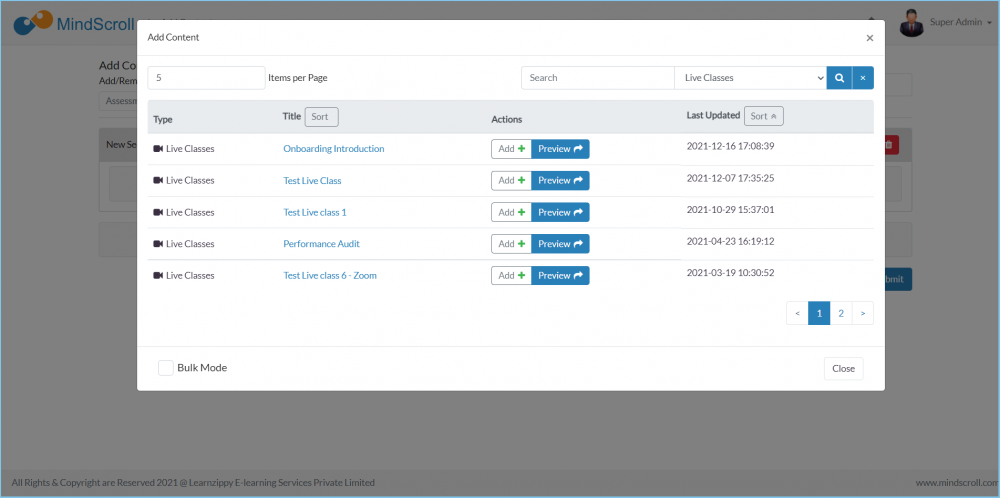
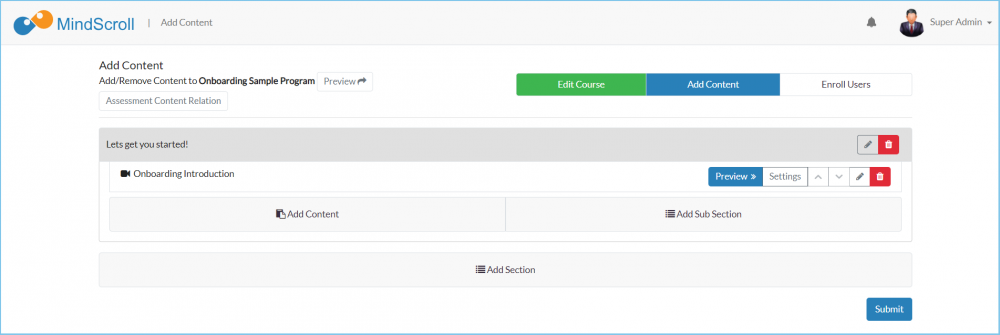
- Click on 'Next' tab which is "Edit Enrollment" if you want to enroll users into this course & if not needed and Click on 'Save' button.
The Live Class is now part of the Course and all users that are enrolled in the course can join by opening the course and clicking on 'View' button against the Live Class.

Please Note: If you do not want the meeting to be part of a particular course, you can copy the meeting URL and share with users via notification or email. Users with valid meeting URL will be able to join the meeting by opening the URL in a chrome browser window. Refer to 'Starting a Live Class' section to know more about how to copy and share meeting URL.
To know more about Course creation, Course Editing and Enrollments, please refer to their respective documentation.
Starting a Live Class
To Start a Live Class, Click on the 'View' button parallel to the live class name.
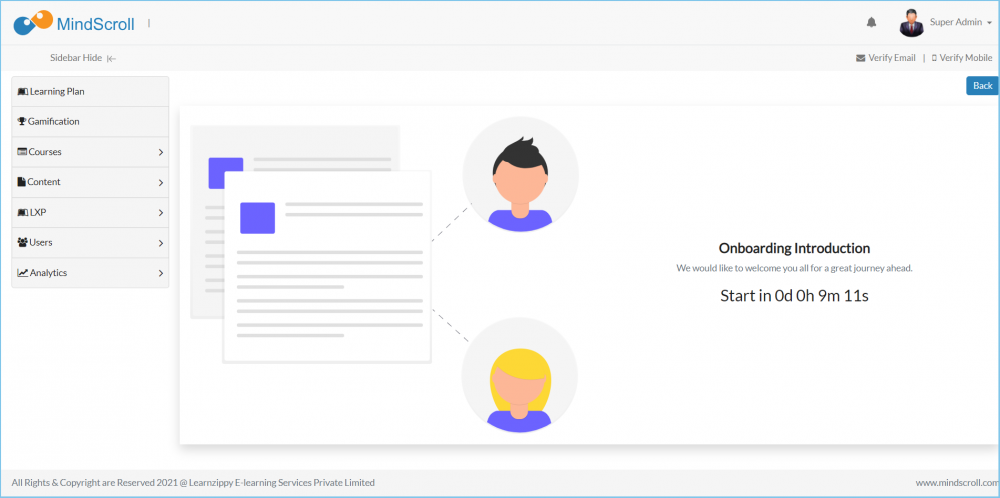
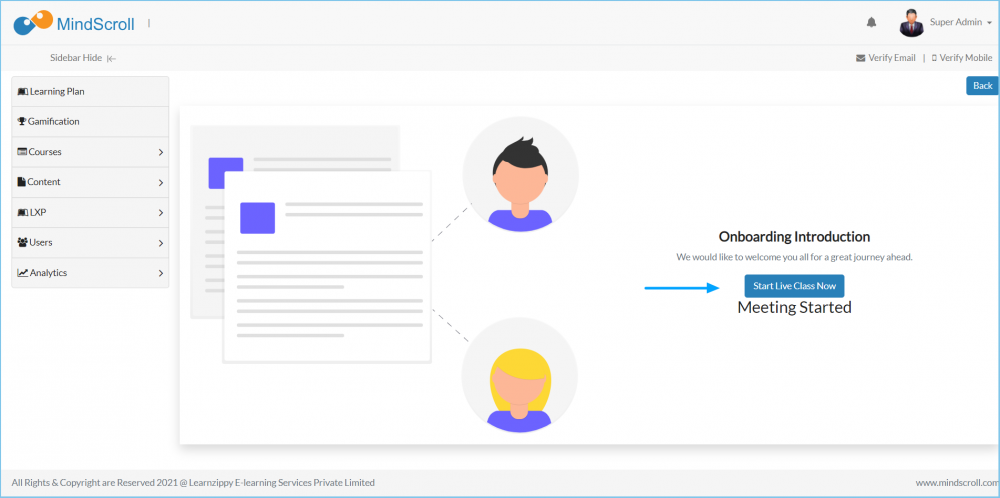
- Click on 'Start Live Class Now' button to start the Class.
Please Note: If you do not want the meeting to be part of a particular course, you can copy the meeting URL and share with users via notification or email. Users with valid meeting URL will be able to join the meeting by opening the URL in a chrome browser window.
To know more about Notifications, please refer to the documentation on Notification.
