Introduction to Course Creation and Management in MindScroll LMS
This is an easy-to-follow step-by-step guide to create and manage a course using course editor into your MindScroll LMS account.
- Navigate to Create Course: To access and follow the given steps, login as an "Admin" or "Instructor" into your MindScroll LMS.
To access the course editor to create a course, click on Content ~> New in the left navigation menu. Or you can click on Content ~> Manage Courses ~> Create Course in the left navigation menu.
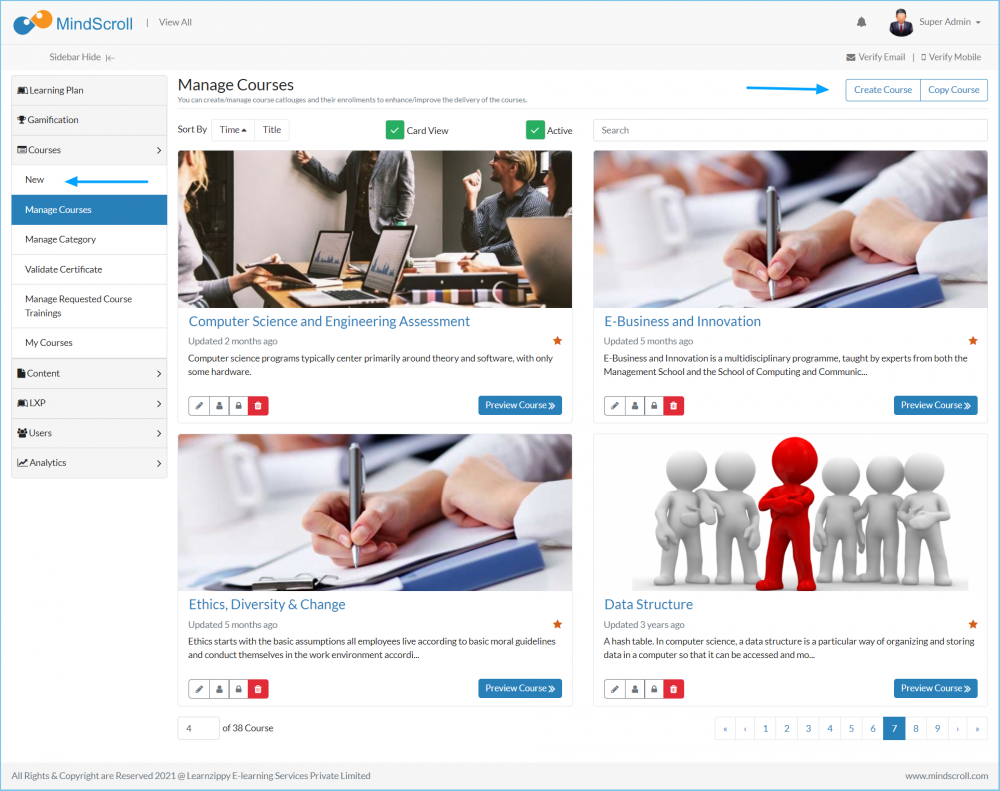
- Both of these options will open up an editor widget, where you can enter the basic details and create a course.
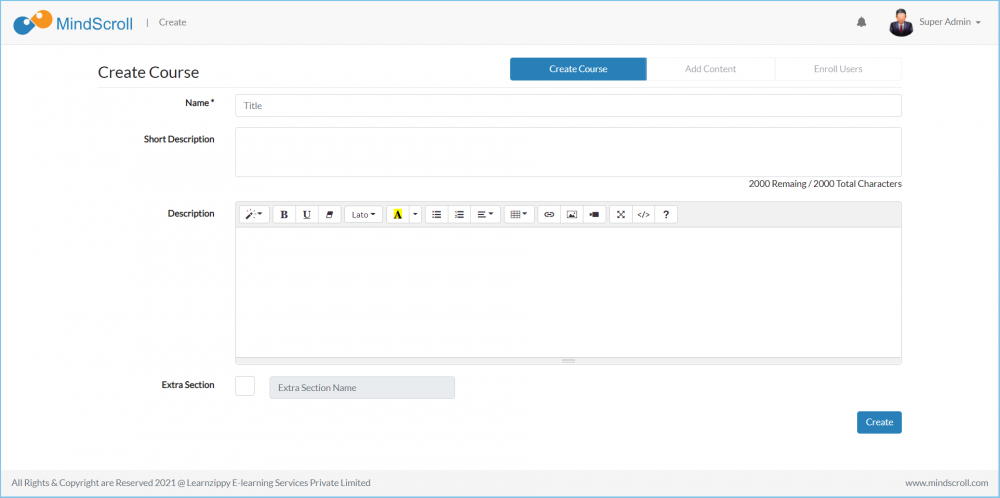
- Name: Enter the course name which will differentiate this course from others. (Star Filed is compulsory to enter)
- Short Description: Short description is a one or two-liner description which will be displayed just below the course name to express the name meaning. (Optional)
- Description: Description is a summarized overview of the overall course structure is defined, to express the need and importance of the course. (Optional)
- Extra Section: Will create a separate tab in parallel to "Description" and "Content", which can be used as reference or extra material data provider tab.
- After filling the details hit "Create" and the system will ask you to add further course details to set the structure and enroll users.
- From the top highlighted area, the admin can shift into the tabs.
- Edit Content: This tab will provide the access to edit the instructional overview, certification & validity details of the particular course.
- Certificates: You can make the course certified.
- Additional Fields: Add additional information highlight the course.
- Validity: You can set the course access time, the users will only be able to access the course in that definite time period.
- Add Content: This tab will provide the access to structure the course objects or assets or packages.
- Enroll Users: This tab will provide the access to enroll the users into the course from the currently active user list.
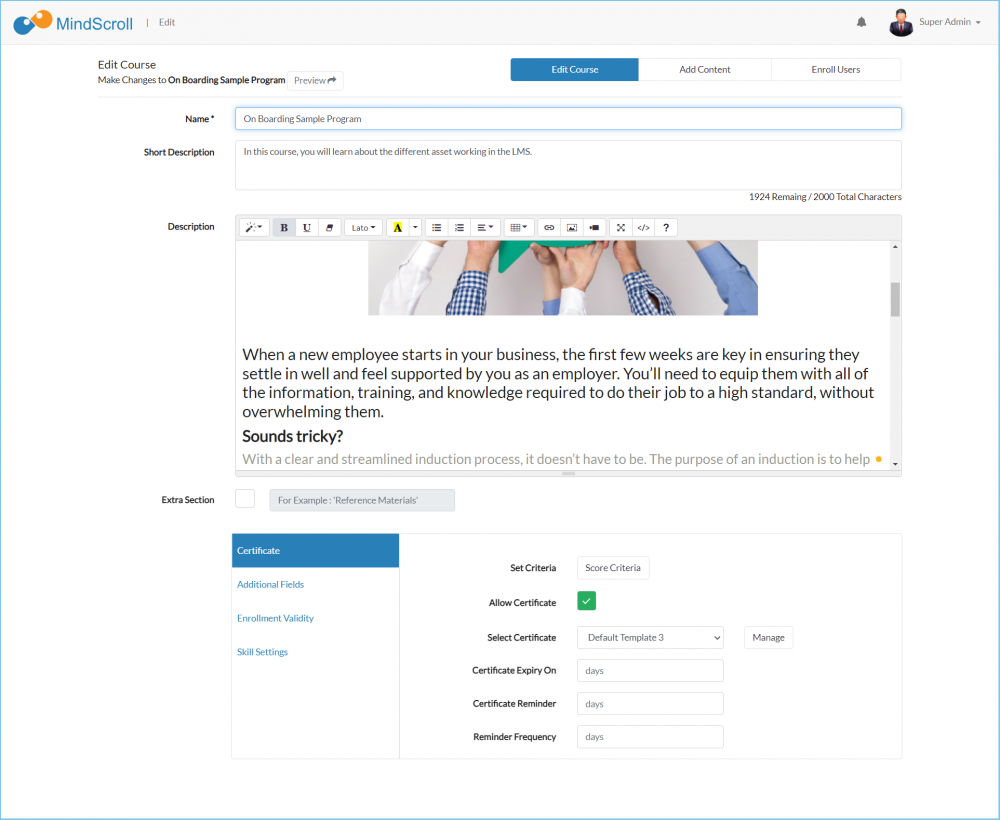
*Set Certification
- Click on 'Allow Certificate'
- Select the particular 'Certificate Format' that the user will get upon completion.
- Certificate Expiry: Based on the selection the user would need to complete the course again to get the certificate.
- Expiry Reminder: It is used to notify the user through e-mail or SMS. The user will be notified till the end of validity like if course validity is getting over in 7 days and you have put a value of 3 days then the user will be notified every day starting from the daily (based on frequency) reminder till the end of validity. (Please Note: In order to work this, Email and SMS must be configured into the portal.)

- Click on the 'Score criteria' and you will be directed to another page. Where you need to set the weight-age of the assets like 'Test Paper' or 'SCROM Package'
- Click on 'Save' to save the weight-age.
- Now Click on the 'Back' to get to the 'Course Page'.
Please Note:
- You need to select a certificate format, in order to present the certificate to the user.
- Certification Criteria will be blank if the course content doesn't have the 'Test Paper' or 'SCROM Package'
- Total weight-age will be 100 in every case, as you can set the weight-age of the assets separately.
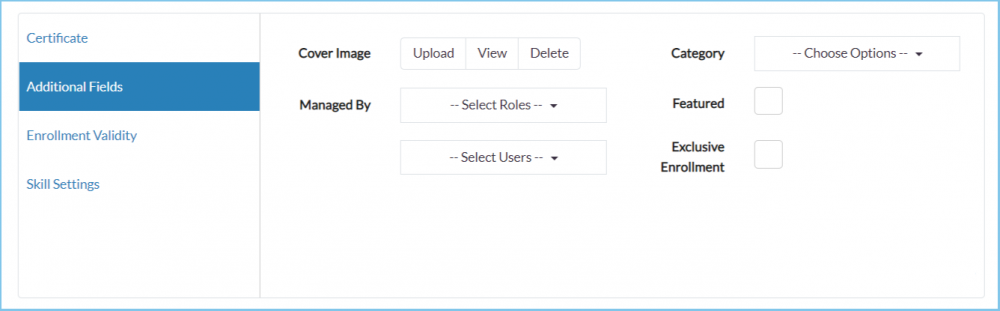
*Let's look into the 'Additional Fields'
- Managed By: You will get the list of instructors or Sub-Admins and by selecting one or many from the list, you are allocating the course to that sub-admin and this give a right to the admin to manage this particular course.
- Featured: To highlight the course on the user side. (Please Note: To check this, login into a user & you need to go to the navigation drop-down ~> 'My Course' landing page.)
- Category: You can assign this course to one or more categories to showcase for filtering the enrolled courses.

*Cover Image: Use the Cover Image option - 'Upload' to Add a Course Cover Image.
- To upload a new course cover image, click on the 'Upload' button against the Cover Image option.
- Select a new Image by clicking on the 'Choose File' button in the modal. Select the image area and click on 'Save'.
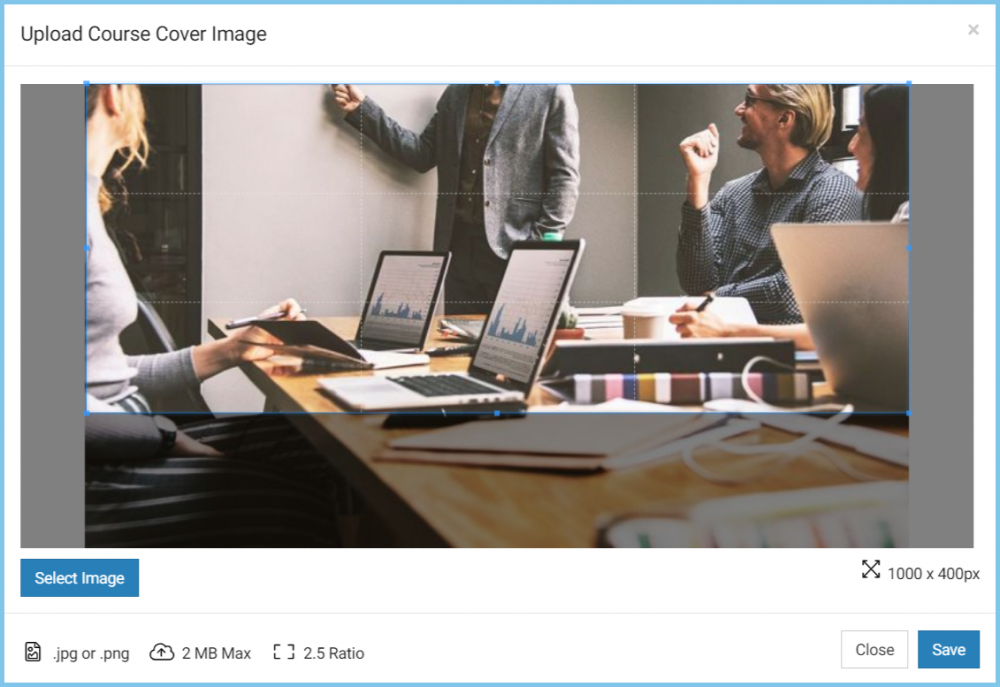
- To view, a course cover image, click on the 'View' button against the Cover Image option.
- To Delete a course cover image, click on the 'Delete' button against the Cover Image option and Confirm your action.
*Set Course Access Validation: (Please Note: You can only set one kind of validity in the course either the 'No of days from the enrollment' or particular date period 'Validity'.)
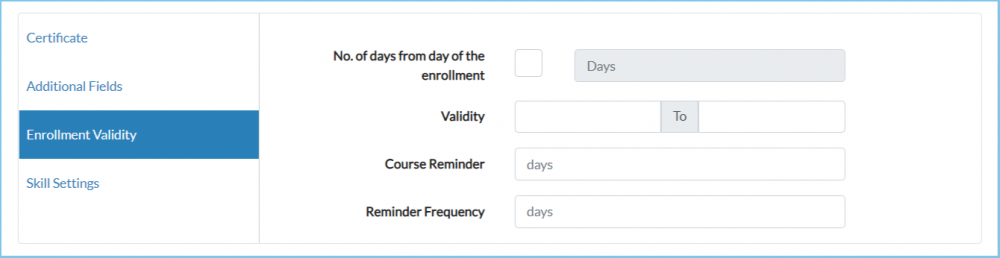
Note: You can only set one kind of validity in the course either the 'No of days from the enrollment' or particular date period 'Validity'.
- Validity: There are two types of validates in the course:-
- Dynamic Validity: It is the "No. of days from the day of the enrollment", as the name explains itself you need to enter the number of days for which the user can access the course after the enrollment day.
- Static Validity: It is the "Validity", in this, you are specifying the particular fixed time which is irrespective of the enrollment date.
- Course Reminder: It is used to notify the user through e-mail or SMS. The user will be notified till the end of validity like if course validity is getting over in 7 days and you have put a value of 3 days then the user will be notified every day starting from the daily (based on frequency) reminder till the end of validity. (Please Note: In order to work this, Email and SMS must be configured into the portal.)
Please Note: To know more about Course Management, please refer to other respective documentation present in the category.
Admin View, Administrator, Administrator Feature, Course Management, Cover Image, Create Course, LMS Platform Navigation


