Introduction to Course Structure and Layout Building through Course Editor in MindScroll LMS
This is an easy-to-follow step-by-step guide to structure and manages a course using course editor - add content into your MindScroll LMS account.
Post Creation of the course you need to visit the Add Content in Course Editor for a particular course.
To add a manage the Course, Go to Courses ~> Manage Course, Select the relevant course, and click on the 'Add Course' icon.
This opens the Content Editor where you can create a course structure with Sections, Sub-sections and add course content in the course.
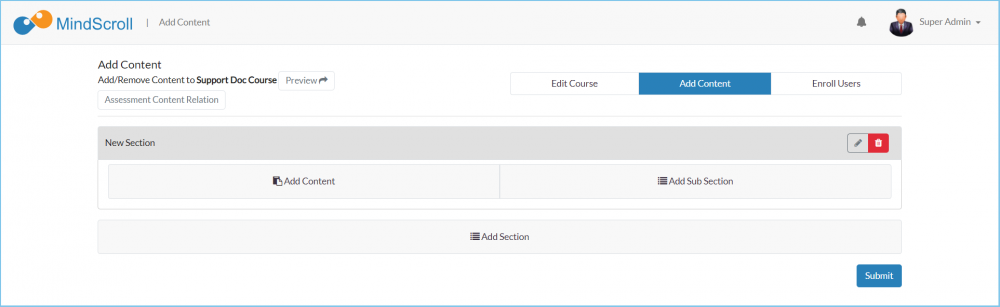
- To add a new section, click on 'Add Section'. Edit section Name by clicking on the 'Edit' icon against the section name, Enter the new section 'Name', and click on 'Yes update it'.
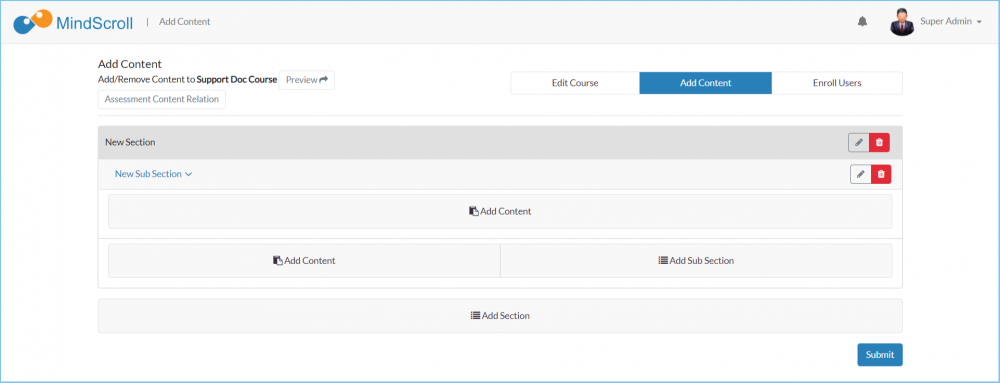
- To add a sub section within a section, Click on 'Add Sub Section'.
- To Delete a section or sub-section, Click on the 'Delete' icon against the section name. Confirm your action by clicking on 'Yes Delete it.' in the Confirm modal after reading the notice information.
Note: When a section or a sub-section is deleted, all its contents are also deleted from the course. (If the users are already enrolled, then their learning will also be deleted permanently)
*Lets Add some Content: To add content within a section/ sub-section, Click on 'Add Content' in the relevant section/ Sub-Section. This opens the content library in a new pop-up.
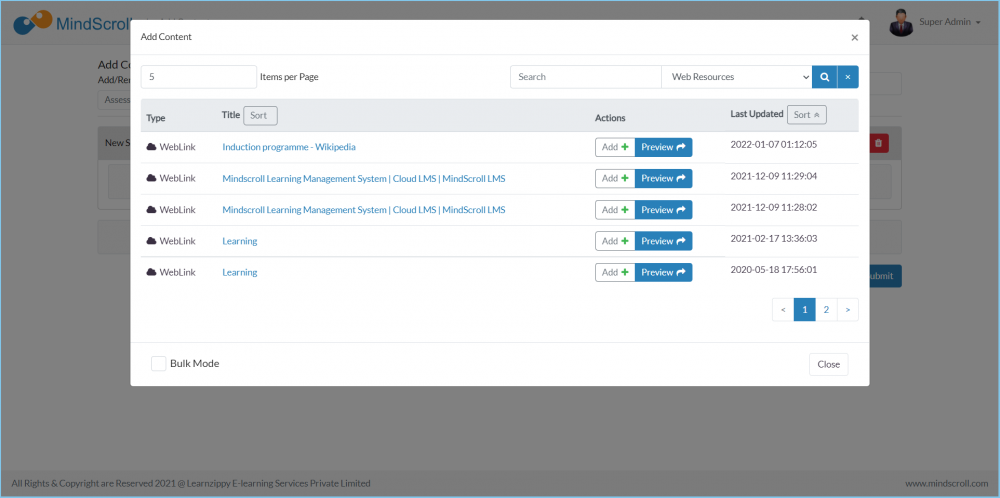
Search for the required Content (Asset) by performing the following:
- Search by title of the asset using the 'Search' box provided on top.
- Sort on Title to see content assets alphabetically.
- Sort of Last Updated time to search for recently added or updated assets.
- View assets before adding by clicking on ‘view’
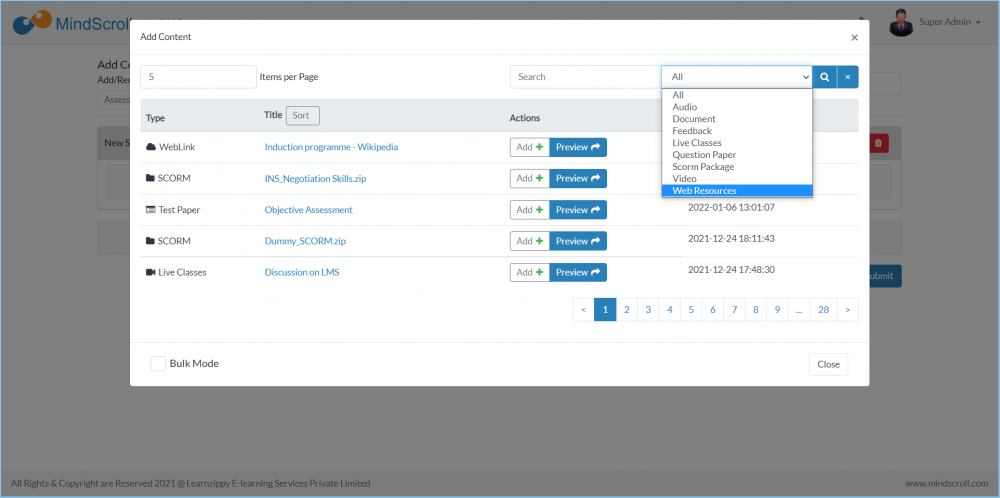
- To narrow the search, filter results by asset type while searching for a specific asset type.
Select the required content asset and Click on 'Add' to add the content to the course. The content gets added to the relevant section/ subsection.
- To add multiple items quickly, click on the ‘Bulk Mode’ check box. This enables adding multiple content assets without closing the pop-up window.
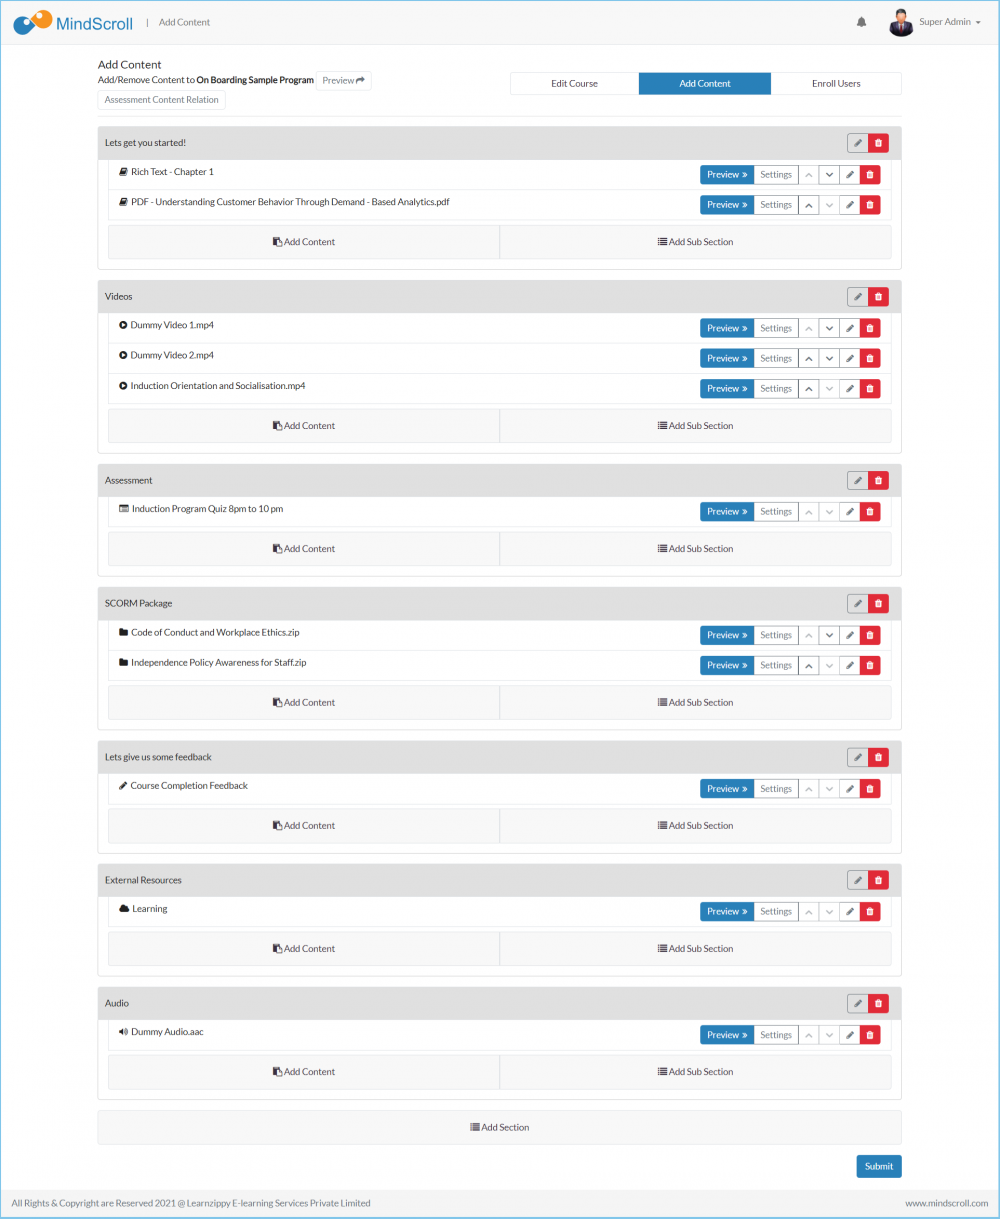
Once all the assets are added in the sections and sub-sections. You can perform the following actions.
- To re-arrange assets within a section or sub-section, click on 'up', 'down' icons against the asset name to move the asset up and down respectively.
- To Edit Asset name, click on the 'Edit' icon against the asset name, Enter the new asset 'Name' and click on 'Save'.
- To Remove an asset, click on the 'Delete' icon against the asset name.
ASSET SETTINGS
To Change Asset Settings, Click on the 'Settings' button against the Asset Name.
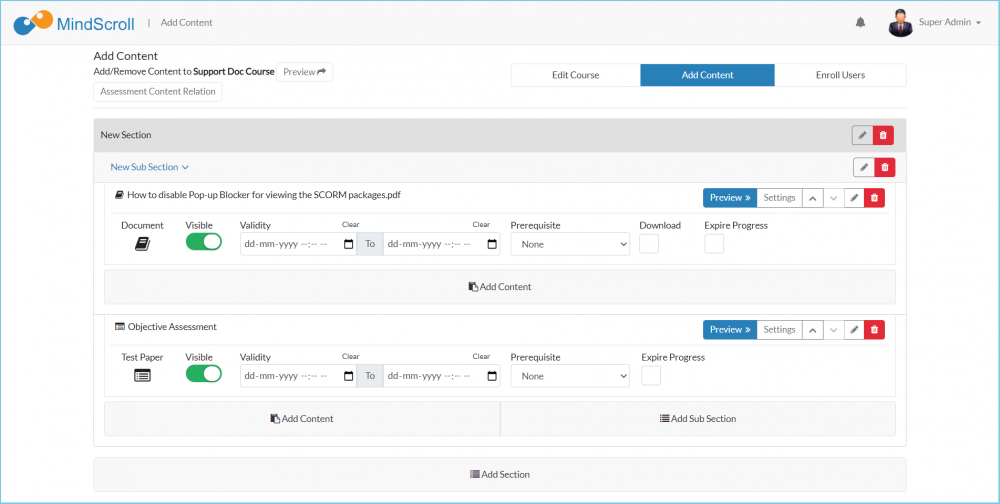
- Switch Asset visibility by Clicking on the 'Visible' on/off switch. Note: If 'visibility' is turned off, the asset will not show up in the Course View.
- Set Asset Validity by setting the 'From' and 'To' date in the Validity field. Note: In case of conflict with course validity, course validity takes precedence over asset validity.
- Define Asset Pre-requisite by selecting a value from the 'Pre-requisite' dropdown.
- None - The asset is always visible
- Just Above - The asset is locked till the previous asset is completed.
- All of the above - The asset is locked till all the previous asset is completed.
- Locked - The asset is always locked.
- Allow to Expire progress of a particular asset while expiring certificate, means a would need to complete single or multiple assets to get the certificate again based on these.
- Allow users to download the asset by checking the 'Download' checkbox. Note: This is applicable only on documents.
Once all the changes are done, click on the 'Submit' button at the bottom to save the changes.
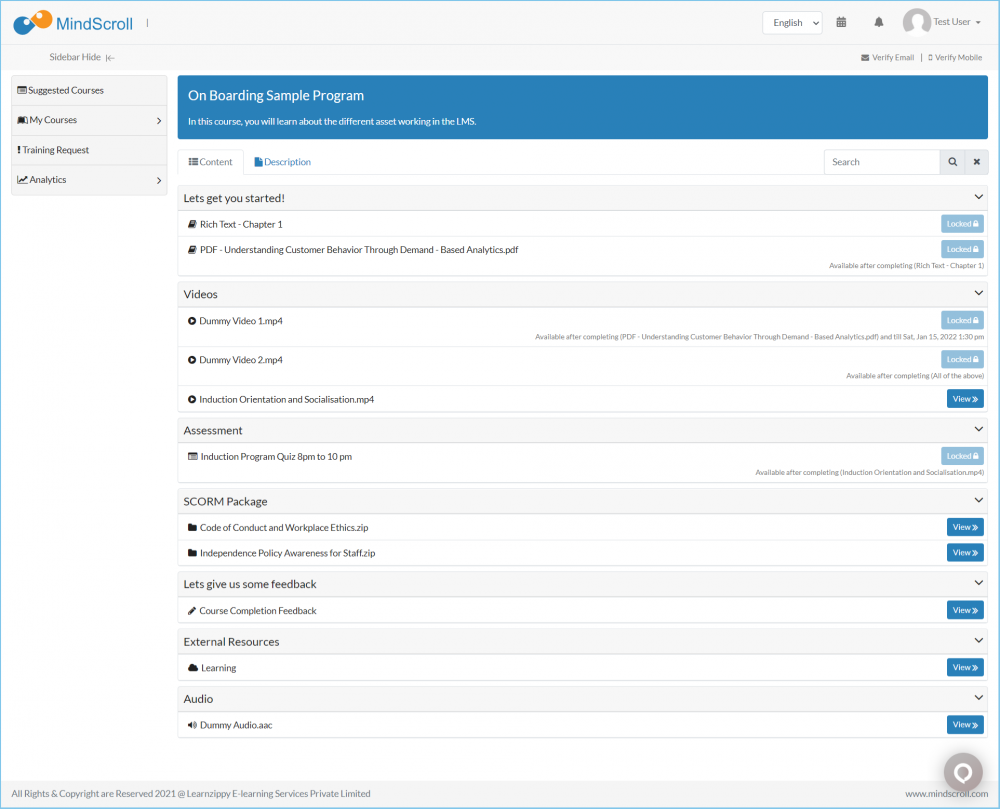
To view the course structure and content, click on the 'Preview' button provided against the course Title.

*Course Layouts: There are 3 types of published course layout:
(Please Note: Actions will be visible depending upon the user access levels.)
- Course List View Layout: In the layout primary detail which will be seen by the user, in the beginning, is "Title".
- Course Card View Layout: In the layout primary details which will be seen by the user, in the beginning, are "Title", "Short Description", "Cover Image".

- Course Detailed Card View Layout: In the layout primary details which will be seen by the user, in the beginning, are "Title", "Short Description", "Cover Image", "Description", "Assets Or Content Objects" Display.
Please Note: To know more about Course Management, please refer to other respective documentation present in the category.
Admin View, Administrator, Administrator Feature, Advanced Filter, Course Management, Course Section, Course Sub-section, Cover Image, Create Course, Delete Course, LMS Platform Navigation, Search Box, Update Course, View Course


